
Black Sacrifice
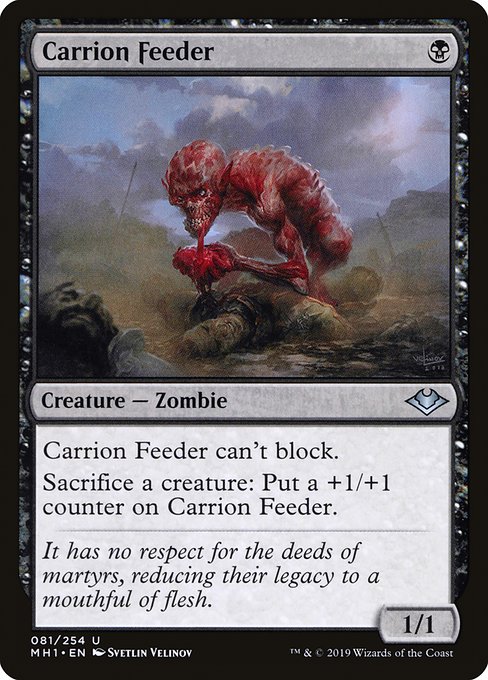
They are the beatdown here and we are protecting a combo. Nothing in their maindeck touches our graveyard or a Dread Return on the stack: Shambling Ghast’s death trigger, Accursed Marauder’s edict and the Snuff Out or Tragic Slip some lists run only remove bodies. So they have to win the race, and Carrion Feeder plus Rite of Consumption have to finish us before a Dread Return puts Lotleth Giant onto the battlefield. Our interaction is little more than Molten Gatekeeper and Masked Vandal blocking their 1/1s, and that is enough: both decks goldfish at a similar pace, but nothing slows the dredge, while their attackers have to spend fodder to get past a 2/3 and a 1/3, so the race tips toward our Return. Their removal only delays the flashback by a body, each draw step can dredge five more cards, and their engine stalls once the ground is blocked and the fodder runs out. Our job is to keep three bodies and enough life around while the yard fills, blocking rather than racing.
In game one, mill and dredge at full speed with Satyr Wayfinder, Town Greeter, Circle of the Land Druid and Malevolent Rumble, and keep the mill creatures out of combat because they are the Dread Return bodies. Keep a fourth body when you can: a Shambling Ghast death trigger or a Tragic Slip kills a 0/1 Plant or Spawn at instant speed, and they can fire the Ghast whenever they want with a free sacrifice outlet. When Accursed Marauder makes each player sacrifice a nontoken creature, give up a spent mill creature, which then counts for the Giant, rather than Molten Gatekeeper.
Count before the flashback. Add the creature cards in the yard to the Molten Gatekeeper pings (cast or unearth it before the turn’s other creatures) and compare that total to their life after any Rite of Consumption. If the Giant will not finish them, the three sacrifices put three counters on Mortician Beetle and on any creature wearing Sadistic Glee, so dredge for another turn unless our blockers can handle that attack. Masked Vandal’s exile is for Sadistic Glee when it shows up: it costs one creature card from the Giant’s count, but the Aura grows its creature off every death, including the three bodies our flashback sacrifices.
Rotten Reunion is their answer to the combo, and every list brings it in after boarding. For one black mana at instant speed it exiles a single card from our graveyard, and its flashback gives each copy a second use. The two targets that hurt are Lotleth Giant in response to Dread Return and Stinkweed Imp in our upkeep before a draw-step dredge. After boarding, never flash back the Return into an untapped Swamp: if they exile the targeted Giant in response, the Return is exiled and the three creatures we sacrificed are already gone.
Mortician Beetle grows off our sacrifices as well as theirs. Each of the three creatures the flashback sacrifices, every Eldrazi Spawn we sacrifice for mana, and both halves of an Accursed Marauder edict can add a counter. Flashing back Dread Return at a count that leaves them alive hands them a Beetle three counters bigger, attacking into the board we just emptied, so a Return that does not kill needs blockers ready for that swing.
Carrion Feeder is their main clock against a deck that blocks with a 2/3 and a 1/3: each sacrifice adds a permanent counter, and it soon outgrows Molten Gatekeeper and Masked Vandal. Do not block it with a mill creature we need for the flashback: they sacrifice fodder in response to grow it past the block, we lose the body, and it keeps the counters. A blocking Stinkweed Imp destroys it at any size, and Snuff Out cannot target the Imp.
Rite of Consumption is their only damage outside combat, and it changes what the combo has to deal. Sacrificing a grown Carrion Feeder or Mortician Beetle drains us for its power and gains them the same amount, so a count that was lethal can come up short after one Rite. When the count already kills, do not wait a turn: a Rite on a grown attacker both drains us and lifts their life back out of the Giant’s range.
In:
Out:
Fang Dragon comes in for Forktail Sweep: for two mana it deals 1 damage to each creature we don’t control, and every creature in their main deck has 1 toughness, so it wipes Carrion Feeder, Mortician Beetle and their fodder before they grow. A milled copy is still a creature card for Lotleth Giant’s count.
Gnaw to the Bone gains 2 life per creature card in our graveyard at instant speed, often double digits by the midgame. That undoes a turn or two of Carrion Feeder attacks or a Rite of Consumption drain and buys the time to rebuild after Rotten Reunion. Three rather than four because the flashback already gives each copy a second cast.
Masked Vandal goes out. Its exile needs an artifact or enchantment they control and costs a creature card from our graveyard, and their lists offer little beyond Sadistic Glee and Shambling Ghast’s Treasure. That leaves a 1/3 that a pumped Bloodthrone Vampire or a grown Carrion Feeder gets past, so it makes room for the sweep and the lifegain.
Malevolent Rumble goes out because it is our only filler that leaves no nontoken creature. Its 0/1 Spawn cannot absorb Accursed Marauder’s edict, it can only chump-block where a mill creature trades with their 1/1s, it gives Mortician Beetle a counter whenever we sacrifice it for mana, and the sorcery itself never adds to Lotleth Giant’s count. The twelve creature fillers dig just as deep, so all four Rumbles make room for Forktail Sweep and Gnaw to the Bone.
Sideboarding shifts this pairing a moderate step toward them: Rotten Reunion and Nihil Spellbomb attack the graveyard our whole plan depends on, while Forktail Sweep and Gnaw to the Bone only buy time against their attack. We stay favored, but the post-board games are closer than game one.
Rotten Reunion and Nihil Spellbomb let them exile Dread Return’s target at instant speed, so we stop flashing it back into open black mana, bait them with a hardcast Return where we can, and use Forktail Sweep and Gnaw to the Bone to buy the turns that takes. Expect Reunion from every list and the Spellbomb from about two-thirds of them. Never flash back the Return into a Spellbomb on the battlefield or an untapped Swamp, because they exile the targeted Lotleth Giant (or the whole graveyard) in response and the Return and three bodies are gone. Hold a drawn Dread Return instead of pitching it to Scrapwork Mutt, and hardcast it for its full four mana when two black sources are available: if they exile the Giant in response, the Return goes to our graveyard rather than exile and nothing was sacrificed, so its flashback is still there for the next try. Otherwise, go off when they tapped out on their own turn. Since they can also exile Stinkweed Imp in our upkeep to stop a draw-step dredge, a second Imp is worth more than usual.
Fang Dragon’s Forktail Sweep kills every creature in their main deck that has not grown. Cast it once they have committed two or three bodies and before Carrion Feeder or Mortician Beetle has a counter. They will sacrifice in response to grow Feeder and Beetle, and the Squirrel, Insect and Mercenary tokens from death triggers arrive after the damage, so the sweep buys time rather than a clean board. It also kills Mesmeric Fiend, which returns the card it took. Have the red ready: Wooded Ridgeline, or a creature to tap for Holdout Settlement or Survivors' Encampment.
Gnaw to the Bone is an instant, so hold it for their big turn. Cast it during their attack, in response to Rite of Consumption, or in response to Nihil Spellbomb so it counts our graveyard before the exile resolves. Save the flashback for a second dose once the yard refills. The life it gains is what lets us wait for a safe Dread Return instead of forcing one into their graveyard hate.