
Black Sacrifice
Black Sacrifice is the beatdown here, and it has no choice about it: before sideboarding, nothing in its deck stops the loop once Ashnod's Altar, Golem Foundry and the Retrievers are on the battlefield, and its creature removal (Snuff Out, Tragic Slip, the -1/-1 from Shambling Ghast dying, the forced sacrifice from Accursed Marauder) only ever hits our creatures and never touches the Altar or the Foundry. So they have to kill us first. Our side of that is to protect the combo rather than fight for the board: the only removal in our main deck is the seven-mana destroy on Giant's Boulder, a terrible rate against one-mana creatures, so we slow their attacks with blocks, Candy Trail and Weather the Storm while the pieces land. They are the faster deck and set the pace; we are the more resilient one, and in a long game our cheap artifacts keep drawing cards and building Foundry counters toward 3/3s that outclass their 1/1s, while their late draws need a board to matter. Both decks want the play, so the die roll pushes the race toward whoever wins it.
Block early with Myr Retriever and Eldrazi Spawn tokens instead of racing. None of their creatures has trample, so a blocker we sacrifice after blocks are declared still leaves the attacker blocked: a Retriever fed to Eviscerator's Insight in the declare blockers step draws two cards and returns an artifact while the attacker deals no damage, and a Spawn sacrificed for mana does the same job for free. Their removal aimed at a Retriever is a gift for the same reason, since it only moves the Retriever into the graveyard, where the loop wants one, and the death trigger still returns a used Expedition Map or Candy Trail to hand. The exception is when Mortician Beetle is on the battlefield: every creature we sacrifice grows it, so let the blocker die in combat instead. Cast Golem Foundry, then Ashnod's Altar, as soon as the mana allows; nothing in their main deck can remove either once it resolves, and holding them gains nothing.
Weather the Storm is better on their turn than ours in this matchup. Storm counts every spell cast that turn, theirs included, and three-quarters of their nonland cards cost one mana, so a copy cast after they have played a couple of creatures, a Village Rites or a Supernatural Stamina, or in response to Rite of Consumption, gains 3 life plus 3 more for each of those spells. Before running the loop, check for Mortician Beetle and anything wearing Sadistic Glee: each creature sacrificed to the Altar grows them, and Rite of Consumption turns that power into damage to us and the same amount of life for them. The fix is to finish the loop anyway, then spend its mana on Giant's Boulder to destroy the grown creature (a Supernatural Stamina in response only brings back a bare 1/1 once we have stopped sacrificing), or end the turn with Weather the Storm for more life than their biggest creature's power.
Mortician Beetle is the card the whole matchup turns on. It grows whenever either player sacrifices a creature, so every Ashnod's Altar activation in the loop, every Retriever fed to Eviscerator's Insight and every Eldrazi Spawn cracked for mana puts a counter on it, and Rite of Consumption then converts that power straight into damage to us. The punish is running the loop while it is on the battlefield with no Giant's Boulder or Weather the Storm to follow: we end our turn with a Beetle carrying a counter for every creature we sacrificed, and on their turn the Rite deals that much to us and gains them the same amount. Many builds also run Sadistic Glee, and the creature wearing it grows the same way from every creature that dies, our blockers included, so treat it as a second Beetle when deciding whether to chump.
Rite of Consumption is their only damage outside combat, and it changes the number we have to track. The sacrifice is paid as a cost, so once the spell is cast no block and no removal stops it; our life has to stay above their biggest creature's power, not just above what their attackers can deal through our blockers. The line to avoid is letting our life sink to the power of their largest creature and then taking an attack from it: they swing, cast the Rite in the second main phase, and the chump block never mattered.
Rotten Reunion only appears after sideboarding, but every list has it, and along with Nihil Spellbomb it is one of the cards that can stop a running loop. Cast in response to a Myr Retriever death trigger, it exiles the Retriever that trigger is targeting, the trigger finds nothing, and Ashnod's Altar and Golem Foundry sit there with nothing left to loop; the flashback gives them a second try, and the Zombie it leaves behind is more sacrifice fodder. Never start the loop post-board with no spare Retriever, and count their open black mana before committing.
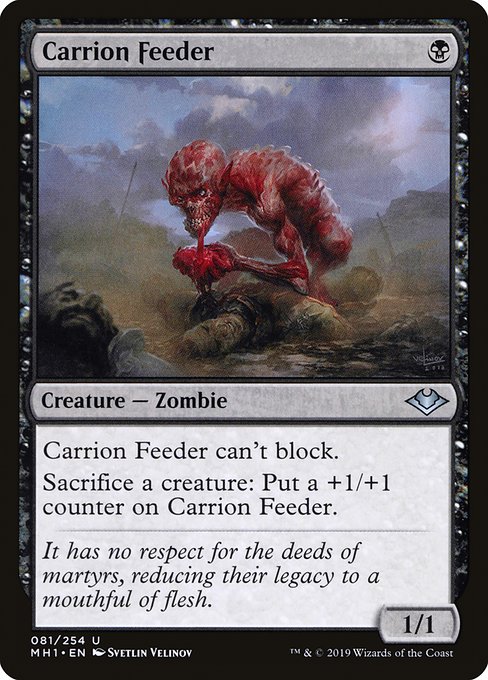
Mesmeric Fiend, in nearly every sideboard, is the only card in their deck that can take Ashnod's Altar or Golem Foundry away from us, and it does so from our hand rather than the battlefield. With Carrion Feeder or Bloodthrone Vampire on the battlefield they sacrifice the Fiend while its enters trigger is still on the stack, so the leave trigger returns nothing and the card is exiled for good. The mistake it punishes is holding the Altar in hand while they have a free sacrifice outlet out; both loop pieces belong on the battlefield the moment we have the mana.
In:
Out:
Moment's Peace comes in because all of Black Sacrifice's damage to us except Rite of Consumption comes from combat. Each copy, cast and then flashed back for 
 , stops two of their attacks while we assemble the loop. It does nothing against the Rite, so it adds turns rather than replacing Weather the Storm.
Bramble Wurm comes in as two copies. Once the Urza lands are assembled it banks 5 life even if Snuff Out or Tragic Slip kills it, blocks their Insect token and their ground attackers as a 7/6 with reach, and tramples over their chump blockers; from the graveyard it gains 5 more for , and it is a threat on the battlefield that their graveyard exile can't stop. Not four, because at seven mana it competes with the loop pieces for the Urza lands' mana, and Moment's Peace already covers the early turns.
Ichor Wellspring goes out: two mana for an artifact that only draws cards, when it doesn't block, gain life or make colored mana while their one-mana creatures attack. Prophetic Prism costs the same and stays because it also fixes green for Moment's Peace.
Energy Refractor goes out because its activation is the most expensive fixing we have, on a two-mana artifact that otherwise only draws a card. Against their early attacks, Giant's Boulder, Prophetic Prism and Conduit Pylons make our green and black more cheaply.
Blood Fountain goes out because returning creatures costs 
 on top of the to cast it, which is slow against their clock. With Rotten Reunion and Nihil Spellbomb in their post-board deck, the creature cards it targets can also be exiled in response.
One Myr Kinsmith goes out. Four mana for a 3/1 that dies to the -1/-1 from Shambling Ghast or trades with any of their 1/1s is too slow to want twice against their clock. One copy stays because it is our only card that searches the library for a Myr Retriever once Rotten Reunion has exiled one.
One Giant's Boulder goes out. Paying seven to destroy one of their one-mana creatures is a poor rate, so we want fewer copies of the destroy mode. Three stay to fix green for Moment's Peace and to destroy a Mortician Beetle our loop has grown.
Sideboarding shifts this pairing moderately toward Black Sacrifice. Their sideboard brings the graveyard exile and hand disruption their main deck lacks, and those cards attack the loop directly, while Moment's Peace and Bramble Wurm only slow their attacks and never touch their sacrifice engine.
The headline change is that the loop can now be interrupted. Rotten Reunion and Nihil Spellbomb can exile a Myr Retriever in response to a return trigger, and Mesmeric Fiend can take Ashnod's Altar from our hand, so the loop needs a spare Retriever and the Altar should reach the battlefield early, while Moment's Peace buys the extra turns that takes. They also bring in more Tragic Slip, which with morbid switched on by any of their free sacrifices kills a Golem token or a Bramble Wurm at instant speed; aimed at a Retriever it only hands us the death trigger.
Moment's Peace takes over most of the early defense. Cast it after they declare attackers, ideally once they have already sacrificed creatures to Bloodthrone Vampire for +2/+2, and flash it back for the next time they attack, so each copy stops two attacks. It does nothing against Rite of Consumption, their only damage outside combat, so keep our life above their biggest creature's power; a Weather the Storm cast in response to the Rite counts every spell they cast before it. Bramble Wurm comes down once the Urza lands are assembled. Its 5 life is banked even if Snuff Out or Tragic Slip kills it, the 7/6 with reach blocks their Insect token as well as their ground creatures, and trample gets its damage past their chump blockers without relying on the graveyard.
The loop now has to get past Rotten Reunion, which exiles the Myr Retriever a return trigger is aiming at, and Nihil Spellbomb, which many lists bring in and which exiles the whole graveyard, including the Retriever just sacrificed. Keep the second Retriever in hand rather than letting Malevolent Rumble or a chump block put it into the graveyard early. Count their open mana (Reunion costs , its flashback  ), and start the loop on a turn after they tapped out on their own turn, with a third Retriever, or Myr Kinsmith to fetch one, ready to keep it going after an exile. A Nihil Spellbomb sits on the battlefield where we can see it, so handle it first: aim a Giant's Boulder at it while our graveyard holds nothing important, and they have to use it then or lose it.
Mesmeric Fiend changes when the loop pieces come down. Cast Golem Foundry and Ashnod's Altar as soon as we can instead of holding them: nothing in their deck touches either on the battlefield, but the Fiend can take one from our hand, and with Carrion Feeder or Bloodthrone Vampire out they sacrifice the Fiend with its trigger on the stack and the card never comes back. Mortician Beetle still grows from every creature we sacrifice, so check for it and keep a Giant's Boulder ready before starting the loop.